Setting Up a G Router for Mac: A Comprehensive Guide
As a Mac user, you want a stable and secure internet connection. A good G router is essential to achieve this goal. In this article, we will guide you through the process of setting up a G router for Mac, including choosing the right router, configuring settings, and troubleshooting common issues.
Choosing the Right Router
When selecting a G router, look for one that is compatible with your Mac device. Some popular options include the Nest Wifi Pro router and the Google Nest Wifi router. Both of these routers offer excellent performance and security features.
Before purchasing a router, check its compatibility with your Mac device. You can do this by checking the router's specifications or by consulting the manufacturer's website.
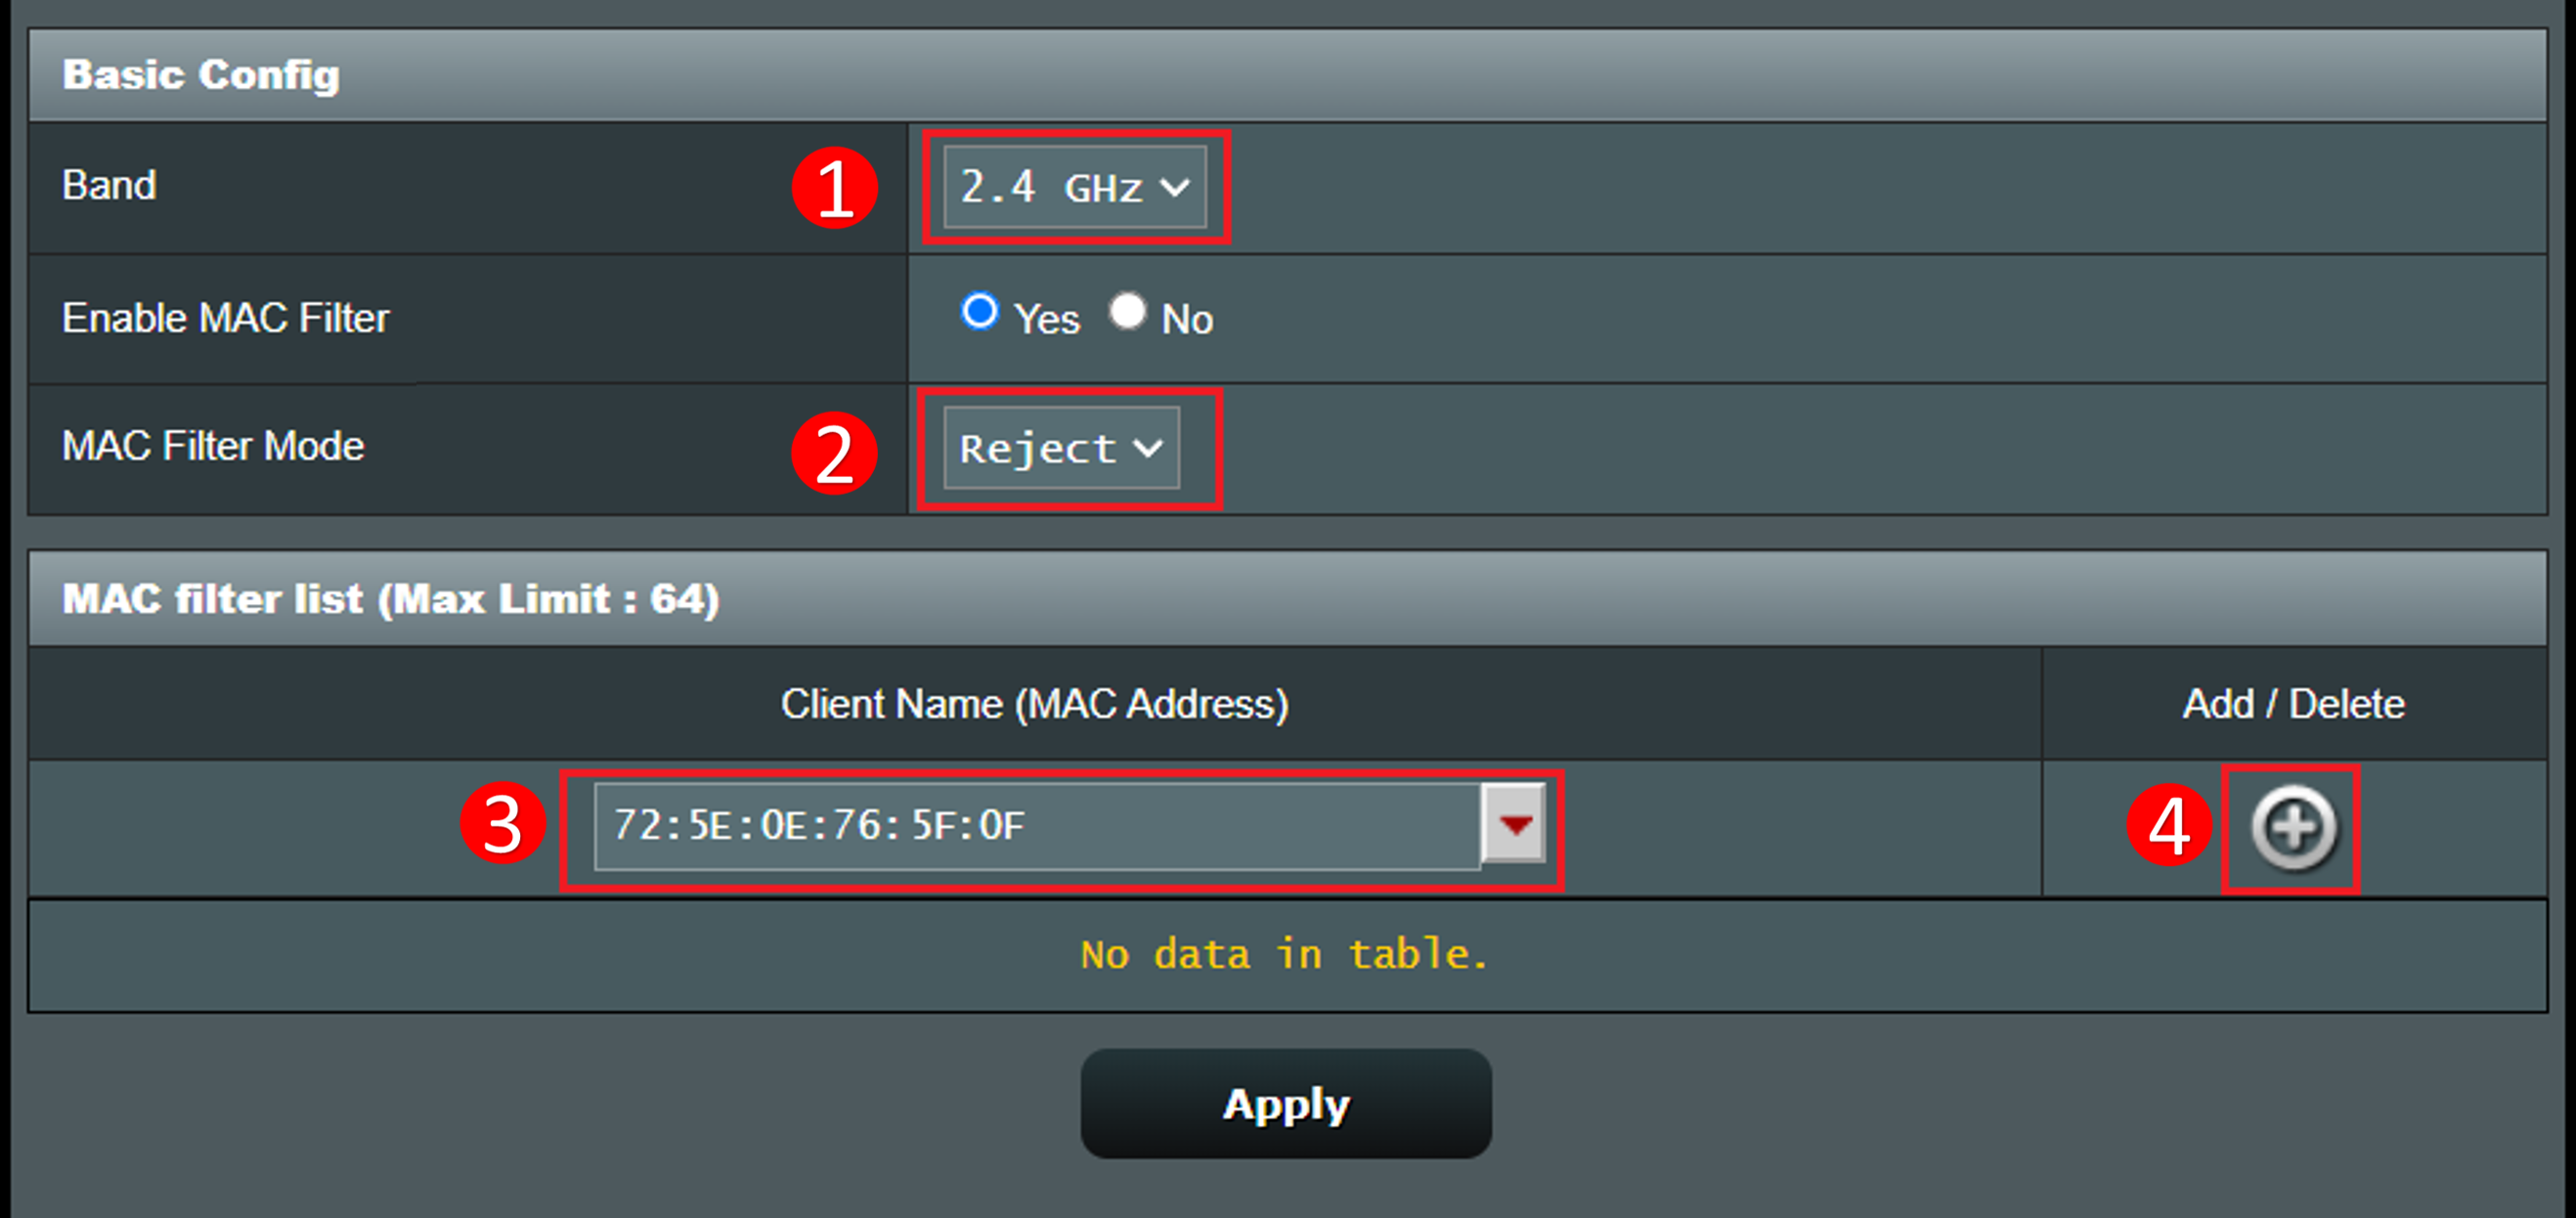
Setting Up Your Router
Setting up your router is a straightforward process. Here's a step-by-step guide to help you get started:
- Plug in your router and power it on.
- Connect your router to your modem using an Ethernet cable.
- Wait for the router to boot up and connect to your modem.
- Open a web browser on your Mac device and navigate to the router's settings page.
- Log in to the router using the default administrator username and password.
- Change the administrator username and password to something more secure.
- Configure your router's settings, including the Wi-Fi network name (SSID), Wi-Fi password, and other advanced settings.
.png "Set up Nest Wifi Pro or Nest Wifi - Google Help")
")


![[Wireless Router] How do I enter my ASUS router's setting page using ...](https://static1.xdaimages.com/wordpress/wp-content/uploads/wm/2024/04/verizon-router-5g-ports.jpg "[Wireless Router] How do I enter my ASUS router's setting page using ...")

 - GL.iNet Router Docs 4")


![[Wireless Router] How to check the information of devices ... - ASUS](https://9to5mac.com/wp-content/uploads/sites/6/2023/04/AirCove-3.jpg?quality=82&strip=all&w=1024 "[Wireless Router] How to check the information of devices ... - ASUS")


 | T-Mobile Support")
")


 - HP")
