Netgear G Router Setup Tutorial: A Step-by-Step Guide
Setting up a Netgear G router can seem like a daunting task, but with the right guidance, it's a simple process. In this article, we'll walk you through a comprehensive Netgear G router setup tutorial, covering everything from unpacking and placement to securing your network.
Step 1: Download the Nighthawk App and Unpack Your Router
The first step in setting up your Netgear G router is to download the Nighthawk app from the App Store or Google Play Store. This app will guide you through the setup process and provide you with a user-friendly interface to manage your network.
Once you have downloaded and installed the Nighthawk app, unpack your router and place it in a stable and secure location. Make sure it's away from any metal objects or other electronic devices that may interfere with its signal.
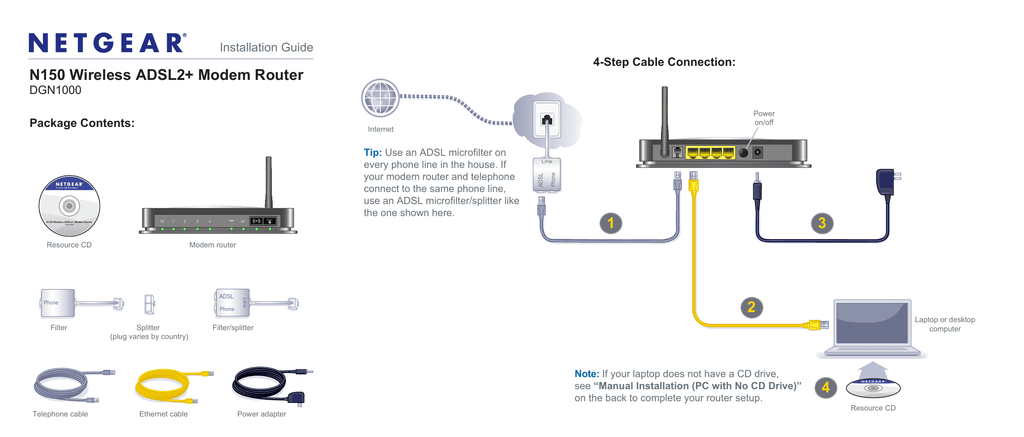
Step 2: Connect to the Internet and Power On Your Router
Next, connect your modem to the Internet port on your Netgear G router using an Ethernet cable. This will establish a connection between your router and the internet service provider (ISP).
After completing the above steps, power on your router and wait for the WiFi LED to light up. This usually takes a few minutes, depending on the router model.


