Netgear Router Setup with Router Configuration: A Step-by-Step Guide
Setting up a Netgear router can seem daunting, but with the right guidance, it's easier than you think. In this article, we'll walk you through the process of setting up your Netgear router with router configuration, so you can enjoy a stable and secure internet connection in your home or office.
Understanding Netgear Router Setup
Netgear makes first-time home WiFi setup stress-free by providing an app-based process that's easy to follow in a few simple steps. To start, you'll need to download the Nighthawk App and unpack your router. Next, connect your router to the modem and power source, and follow the app's simple on-screen instructions.
Step-by-Step Guide to Setting Up Your Netgear Router
Here's a step-by-step guide to help you set up your Netgear router with router configuration:
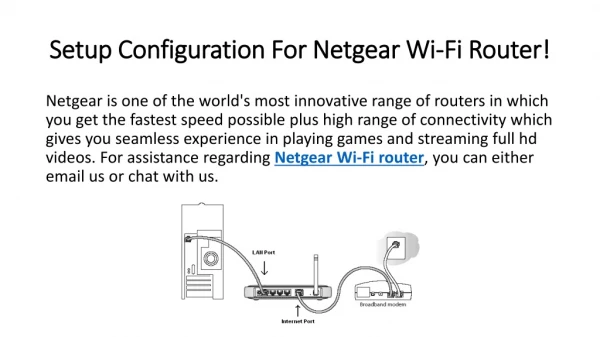
- Step 1: Unpack and Connect Your Router Unpack your Netgear router and connect it to the modem and power source. Make sure all the cables are securely connected.
- Step 2: Download the Nighthawk App Download the Nighthawk App from the App Store or Google Play Store and follow the in-app instructions to set up your router.
- Step 3: Configure Your Router Configure your router's settings, including the wireless network name (SSID), password, and security options. You can also configure advanced settings, such as port forwarding and Quality of Service (QoS).
- Step 4: Connect Your Devices Connect your devices to the wireless network and test the internet connection to ensure everything is working properly.
- Step 5: Secure Your Router Secure your router by changing the default admin password, enabling WPA3 encryption, and setting up a guest network.


 On Amazon")


